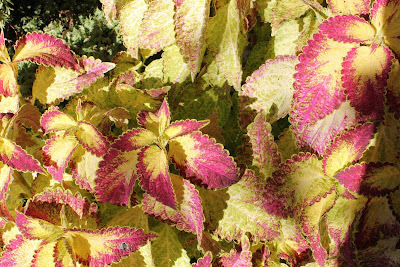
Coleus Cuttings...
Taking cuttings is fairly simple, but you will need a few things:
A good sharp knife
Transplanting pots (plastic cells with seed starting mix work well)
Rooting hormone (available at good nurseries/garden stores)
Plant labels (popsicle sticks and tongue depressors work well)
Waterproof pen for labeling
Pencil or screwdriver to make holes in the potting medium
Drinking straws
Clear plastic wrap or large clear plastic bags
Rooting medium
- low in nutrients, well draining, water-retaining
- soilless is best
- commercial propagation mixes are available
- You can try a mix of 2 parts quartz sand and 1 part Sphagum peat (I don't recommend using
peat because of the negative environmental impact associated with harvesting peat.)
- Jiffy peat pellets work well, but then again, we are back to peat... they must be rehydrated
First, prepare your medium by putting it in pots or cells and wetting it well. Set up a work station so that you can work quickly. Also, put on some gloves, you don't want to touch the rooting hormone with bare hands (don't follow my bad example...).
To cut coleus, you will be taking a stem tip cutting. A stem tip cutting is taken from the ends of stems where new growth is occurring. You will cut the stems about 4-inches long, making the cut just below a node. A node is a bump in the stem where the petiole for a leaf will emerge. (See diagram below). You want to make a 45º angled cut. I cut mine a little long and then go back and cut at the right spot with a very sharp knife, so that the cut is clean.
After you have made your cuts, put the cuttings in a bowl with luke warm water, you don't want them to wilt. One at a time, pull the leaves from the stems, all but the top two or four leaves. The less vegetative tissue the plant has to support the better. If your cuttings have any flowers or flower buds, pinch them off, if not the cutting will put energy into making seeds and not rooting. After you have cleaned the stems, put each cutting back in the water.
With a pencil or a screwdriver, poke a hole about the diameter of the stem in the rooting medium. This makes it easy to push the cutting down into the medium without breaking it. Dip each cutting into the rooting hormone (about 1/2- to 1-inch up the stem) and then stick the cutting into the hole in the potting medium. Repeat until all the cuttings are stuck, making sure that the node is covered with medium.
Label and place straws in the medium. The straws will hold up the plastic so it doesn't lay on the cuttings. Cover the pot or cell with plastic. Alternatively, you can use what I have used - plastic trays that have a clear plastic cover that fit over them. By covering the cuttings, you increase the humidity in the cutting's environment, decrease transpiration (plant loosing water through it's leaves), and decrease the need to water. Place in a lighted area (not intense sun, but moderate light - near a large window is a good place).
This is so much fun for kids to watch. My two farmhands have loved seeing the roots form from stems. It's a little awe inspiring for kids and adults alike.
This works with other plants too, here is a list of plants that can be vegetatively propagated by stem tip cuttings:
*most herbs propagate easily from stem tip cuttings*
Aluminum plant
Aphelandra
Arrowhead plant
Begonia
Chrysanthemum
Carnation
Coleus
Crown of Thorns
Dahlia
Dieffenbachia (dumbcane)
Dracaena
Euphorbia
Fittonia
Geranium
Hoya
Hydrangea
Impatiens
Ivy
Jade
Kalanchoe (brophyllum)
Latana
Mint
Periwinkle
Petunia
Poinsettia
Velvet plant
Wandering Jew
Plus, many more...
Have fun with this!


Comments
Post a Comment